DLT registration/signup process in Vodafone (vilpower.in)
As per the latest TRAI guidelines, every Individual/Business Entity needs to register on a DLT platform to continue sending SMS to its customers and clients. TRAI has made DLT registration mandatory for every Individual/Business Entity who wants to use Bulk SMS Service to communicate with their customers.
Add following in your DLT registration :
Telemarketer Name: SID GROUPS
Telemarketer ID: 1102524310000011354
Click here to understand the meaning of DLT in Bulk SMS
Click here to know the revised TRAI Guidelines 2020 for Bulk SMS Service
Click here to know about different DLT operators
Click here to view in detail about the previous rules and new rules governing the Bulk SMS Industry.
Here, we have described the process of registering in Vodafone DLT.
Follow the steps below to Signup in Vodafone DLT:
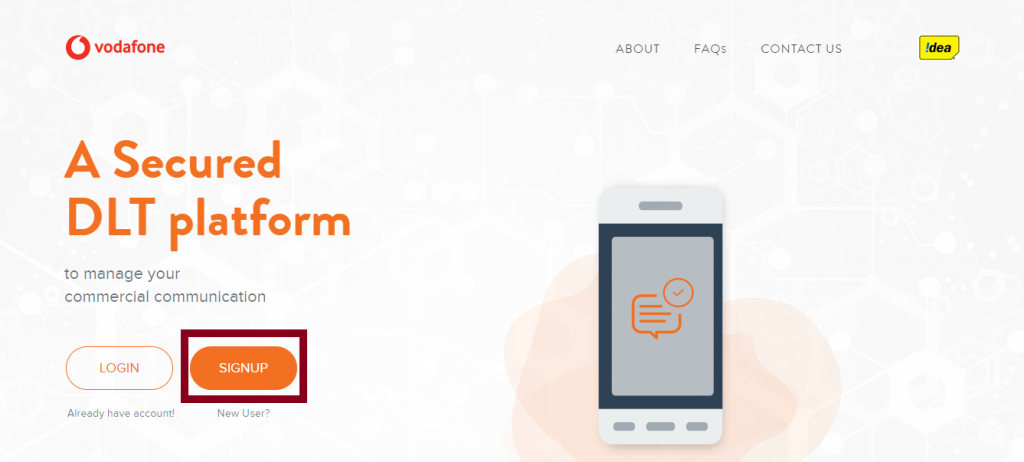
1. Visit the link – https://www.vilpower.in/signup/
The page will be displayed as shown in the image below. Click on the Signup button to register in the Vodafone DLT platform.
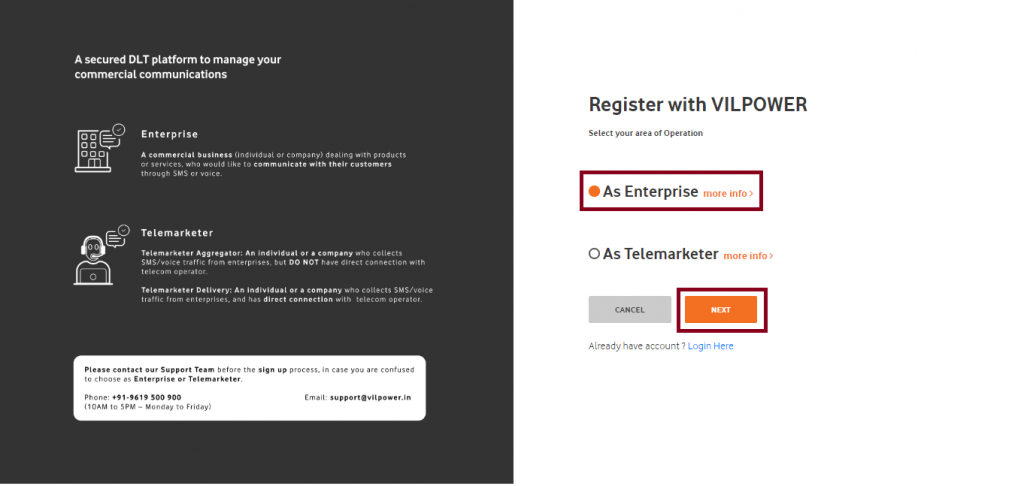
2. Upon clicking the Signup button, you will be re-directed to the next page and asked to choose one option between the two. Select the appropriate option and click on the Next button.
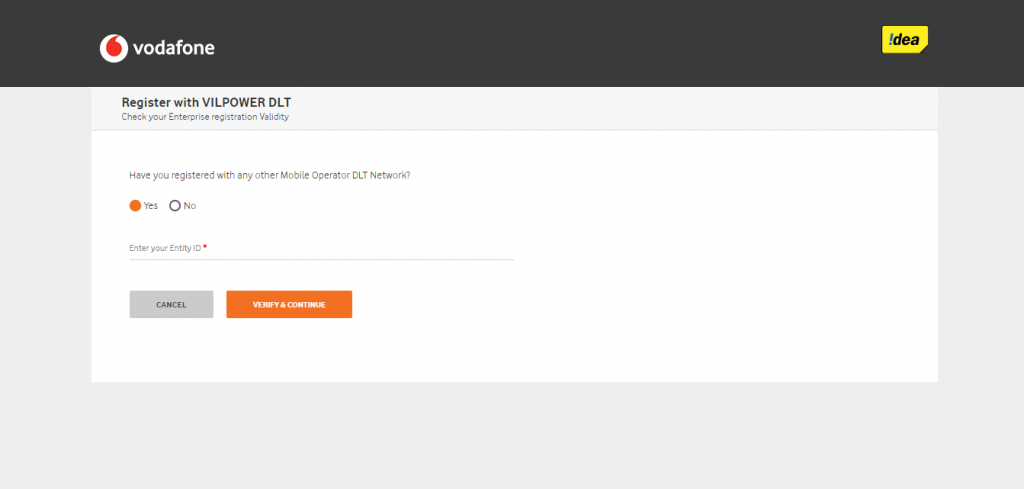
3. After clicking on the Next button, another page will get displayed asking whether you have registered with any other mobile operator DLT network.
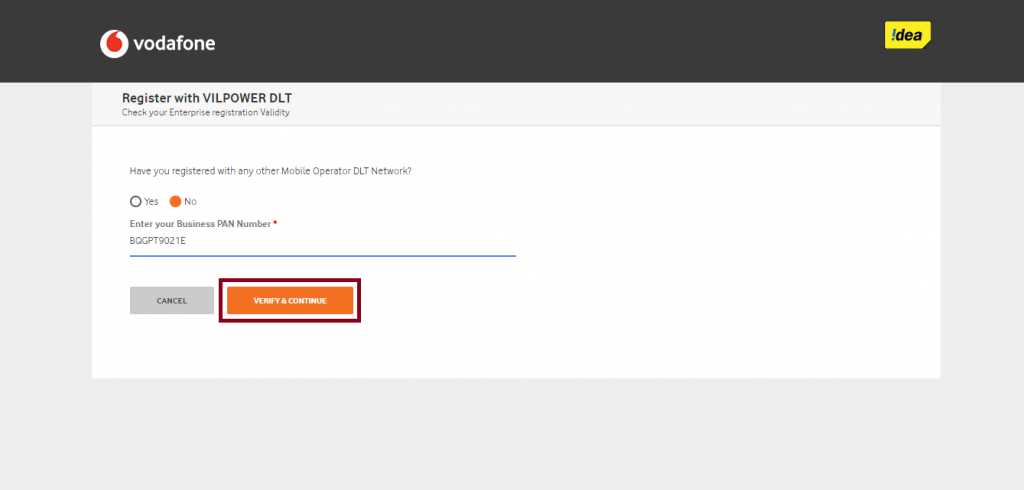
4. If you have not registered with any other “DLT SMS” mobile operator then select the ‘No’ button and then you will be asked to enter your Business PAN number. Enter your PAN card number and then click on the button ‘Verify and Continue‘.
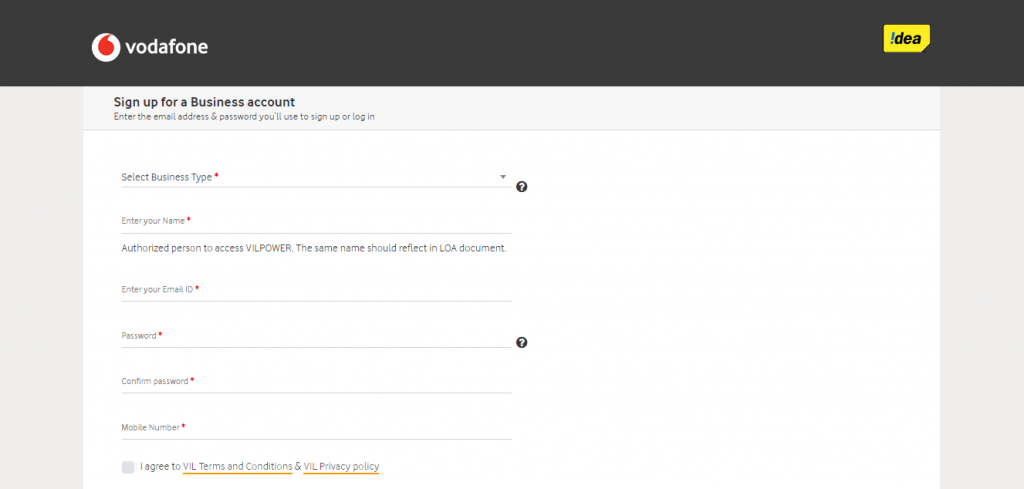
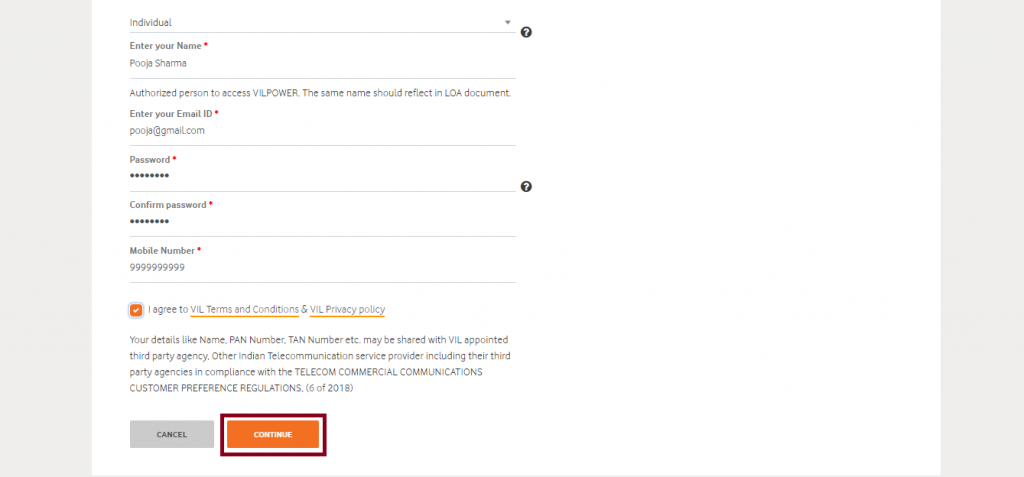
5. After clicking on the Verify and Continue button, next window will appear asking you to sign up for a business account. Here, you need to select your business type, enter your name, email id, password, mobile number and then click on the ‘I agree to VIL terms and conditions’ checkbox.
6. After entering all the details, click on the Continue button to proceed with the registration.
7. As you click on the Continue button, OTP will appear on your registered mobile number. Enter the OTP and click on the Verify button.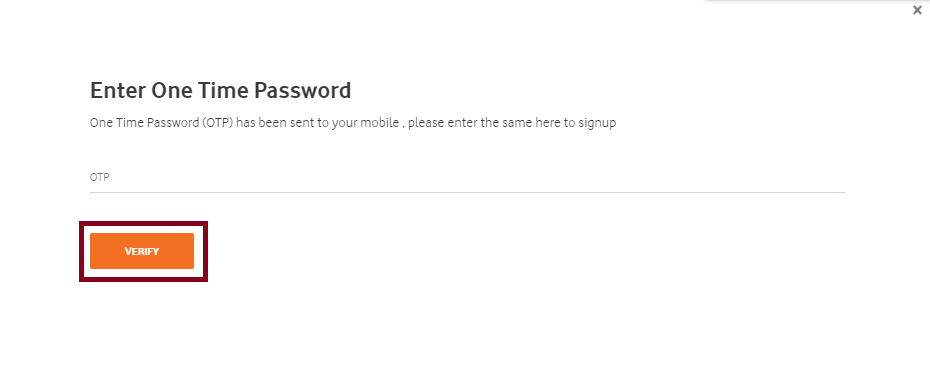
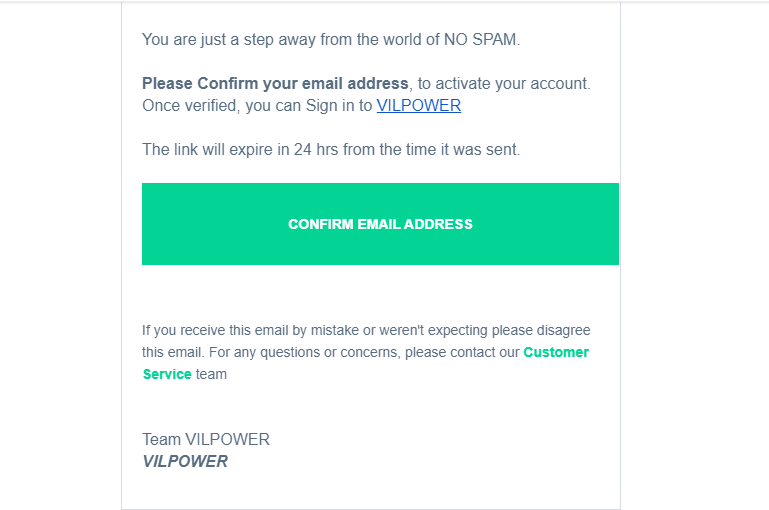
8. A verification link will be emailed to you. You need to click on the link in your email inbox to complete the sign up process.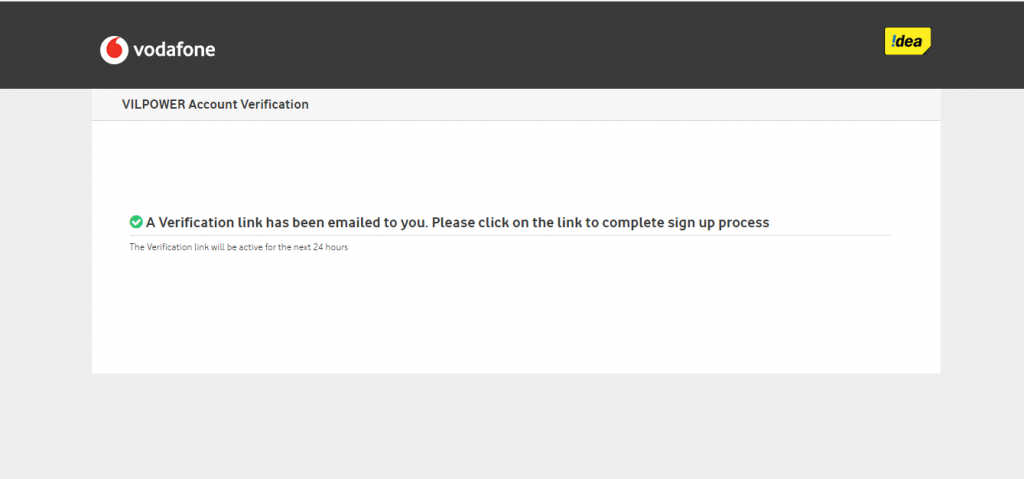
9. The verification link will be displayed in your email inbox as shown in the image below. Click on the ‘Confirm Email Address‘ box to complete your account verification.
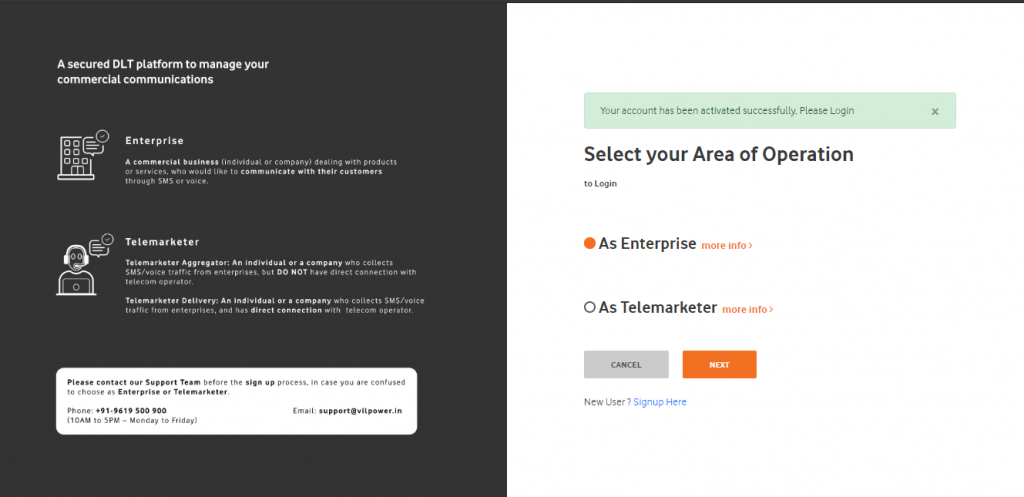
10. As you click on the ‘Confirm Email Address’, a message will be displayed on your screen that ‘Your account has been activated successfully, Please Login’. Select the appropriate option between Enterprise and Telemarketer and then click on the Next button.
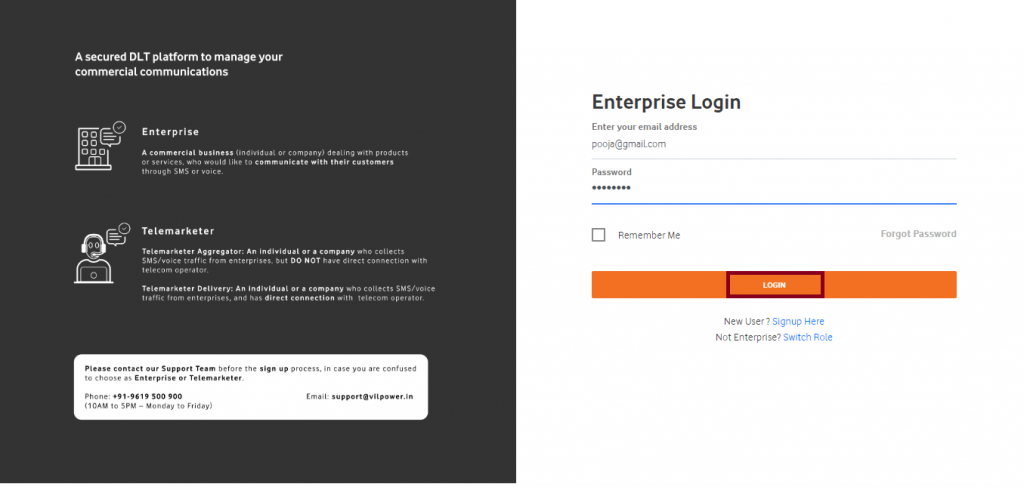
11. As you click on the Next button, another window will get opened asking you to enter your email address and password. After entering the details, click on the Login button.
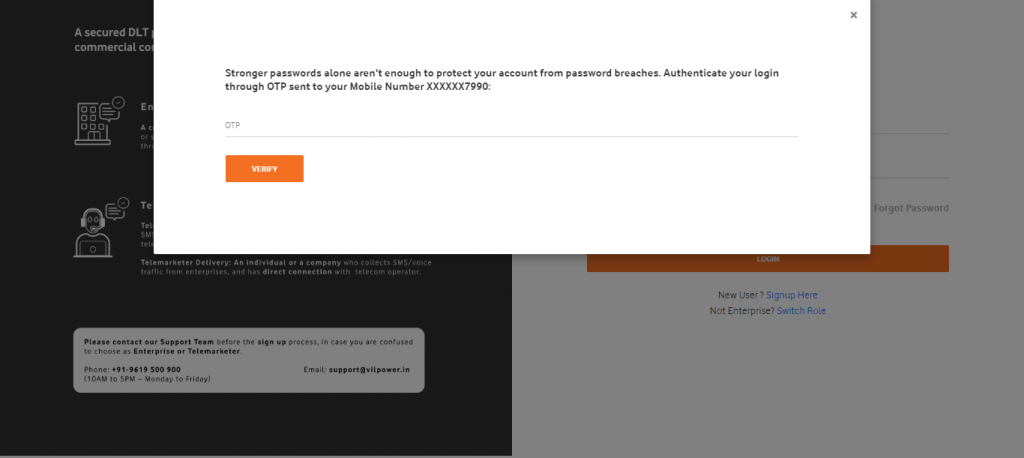
12. As you click on the Login button, another window will appear where you need to enter OTP received on your registered mobile number. Enter the OTP and click on Verify.
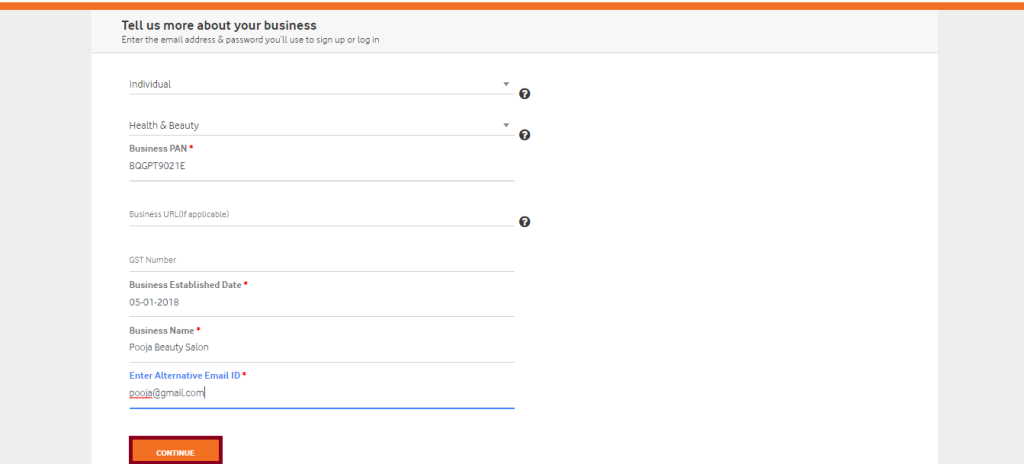
13. A window will get displayed where you need to enter your business details. As you click on the, ‘Select Industry Type’ field, a number of options will get displayed such as Individual, Sole Proprietorship, Partnership, Private/Public Company Ltd, etc. In the next field, different categories of sectors like Finance, Retail, Health, etc. will be displayed. Select your Business type and Industry from the list and then enter further details. After entering your Business PAN card, Business established date, name and alternative email id, click the Continue button.
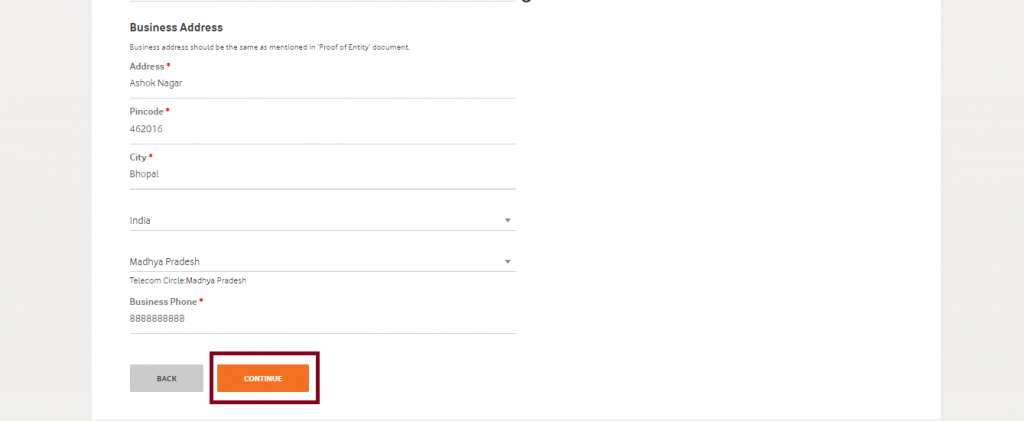
14. As you click on the Continue button, another window will get displayed where you need to enter your Business Address details. Enter all the details and then click on the Continue button.
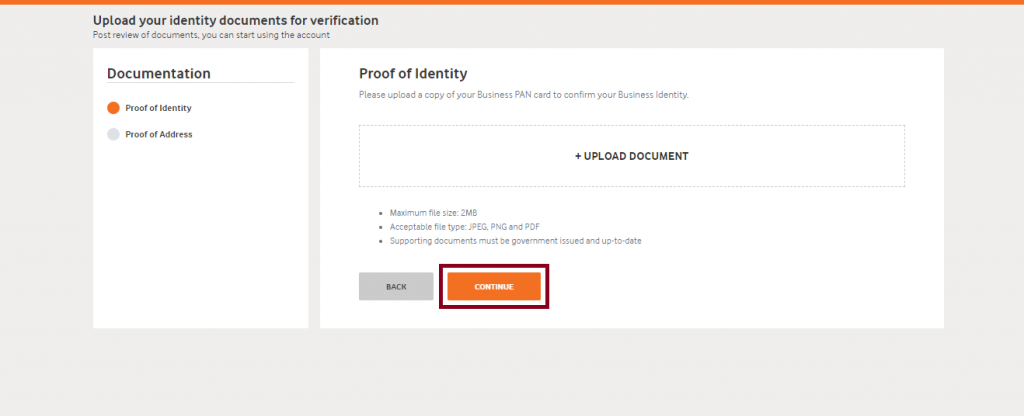
15. As you click on the Continue button, next window will appear where you need to upload your identity documents for verification. Click on the Upload Document to attach your PAN Card and then click on the Continue button.
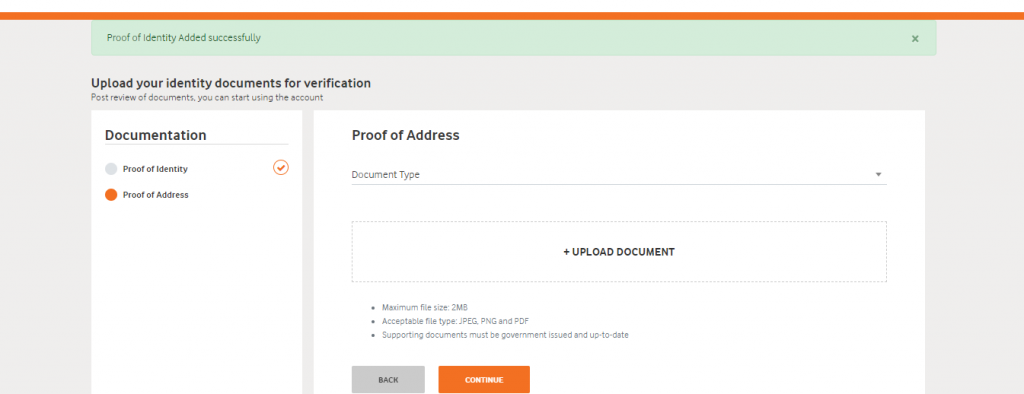
16. As you can see, a message will be displayed at the top of the screen that ‘Proof of Identity Added successfully’.
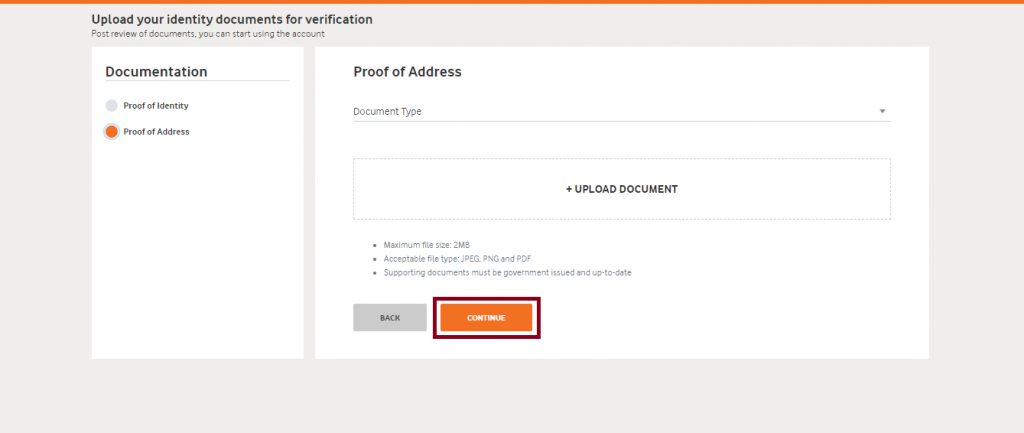
17. Next, you need to upload document for the Address Proof. Select the Document Type from the list of options such as Driving License, Voter ID, Passport, attach the document and then click on the Continue button to proceed further.
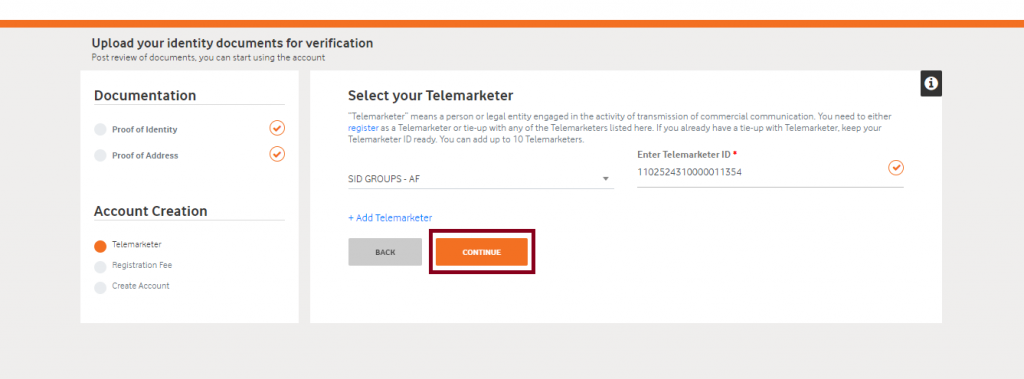
18. After you have uploaded the document, a message will appear on the screen that your document is added successfully as shown in the image below. Here, you need to select the Telemarketer(Bulk SMS Service Provider) from which you want to purchase Bulk SMS Service and after entering the Telemarketer ID, click on the Verify button.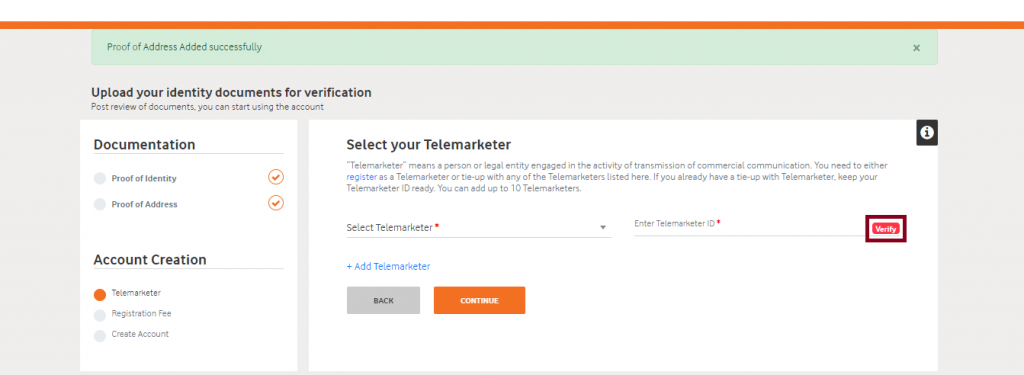
19. Select SID GROUPS as your telemarketer if you want to purchase Bulk SMS Service from Fast2SMS. Enter the Telemarketer ID as 1102524310000011354 and click on the Continue button.
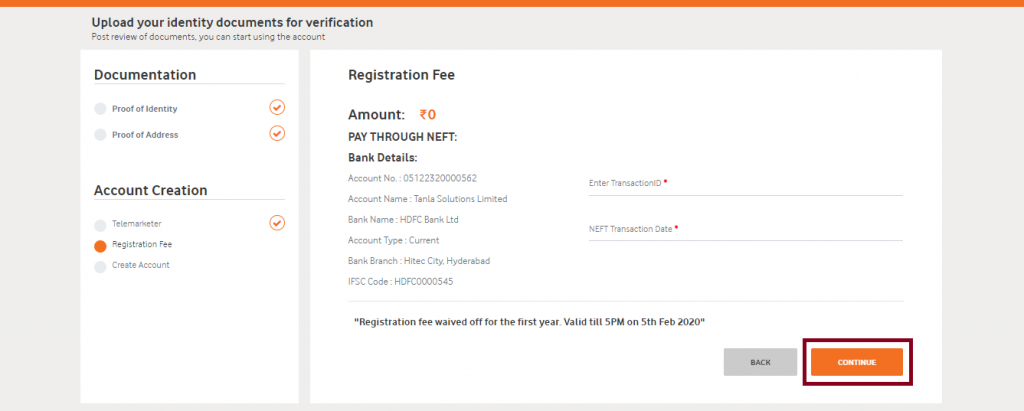
20. As you click on the Continue button, you will be re-directed to the registration fee page. Registration charges of INR 5900/- may apply.
21. A message will be displayed on your screen that your payment is successful. Now, click on the button ‘Continue to create account’.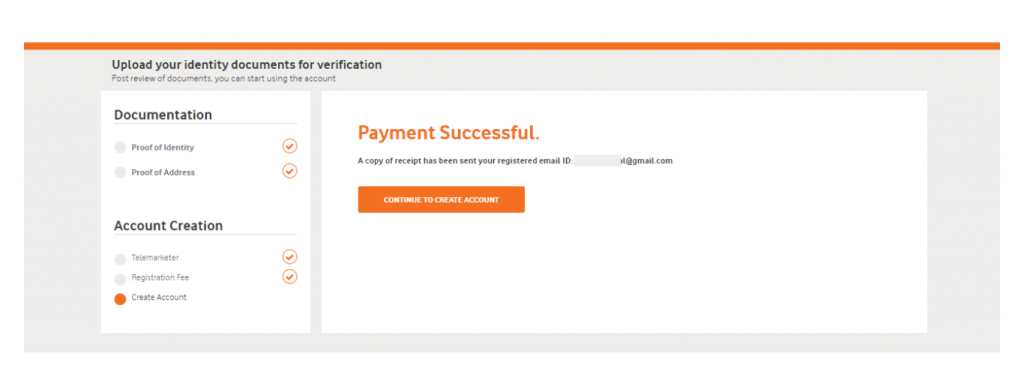
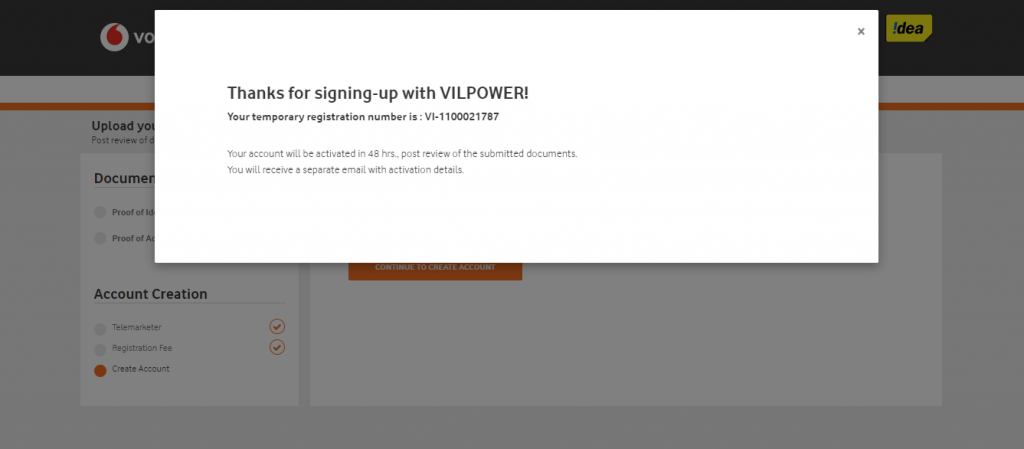
22. As you click on that button, a dialog box will be displayed with the message ‘Thanks for signing-up’.
23. Your account status will appear as pending for activation and once your documents get verified, your account will get activated.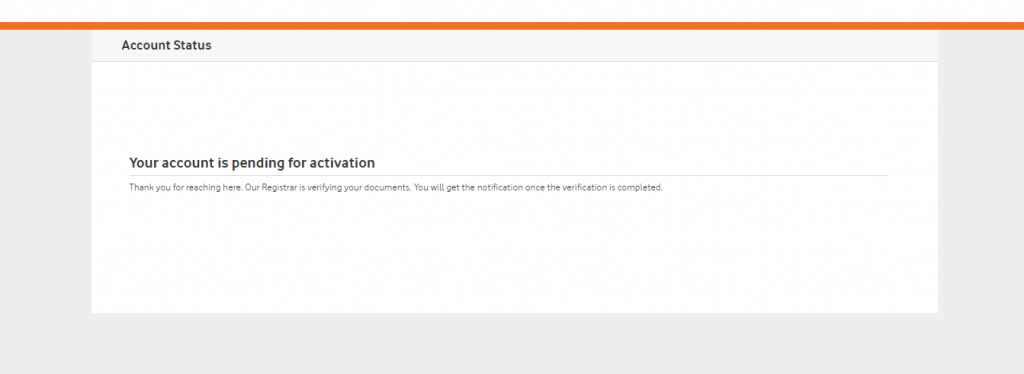
This is the process of creating account in a DLT platform. After registration you have to wait till further notice by TRAI.
Check other related articles:
- New DLT Platform – TRAI Rules For BULK SMS 2020
- What is going to change in Indian Bulk SMS (Before & After)?
- Different DLT Operators In India (Videocon, Vodafone Idea, Airtel, BSNL, Jio)
- What is DLT in Bulk SMS?
- Difference between Enterprise and Telemarketer in DLT platform
- What is Promotional, Transactional and Service Bulk SMS routes in DLT?

